The Short Answer
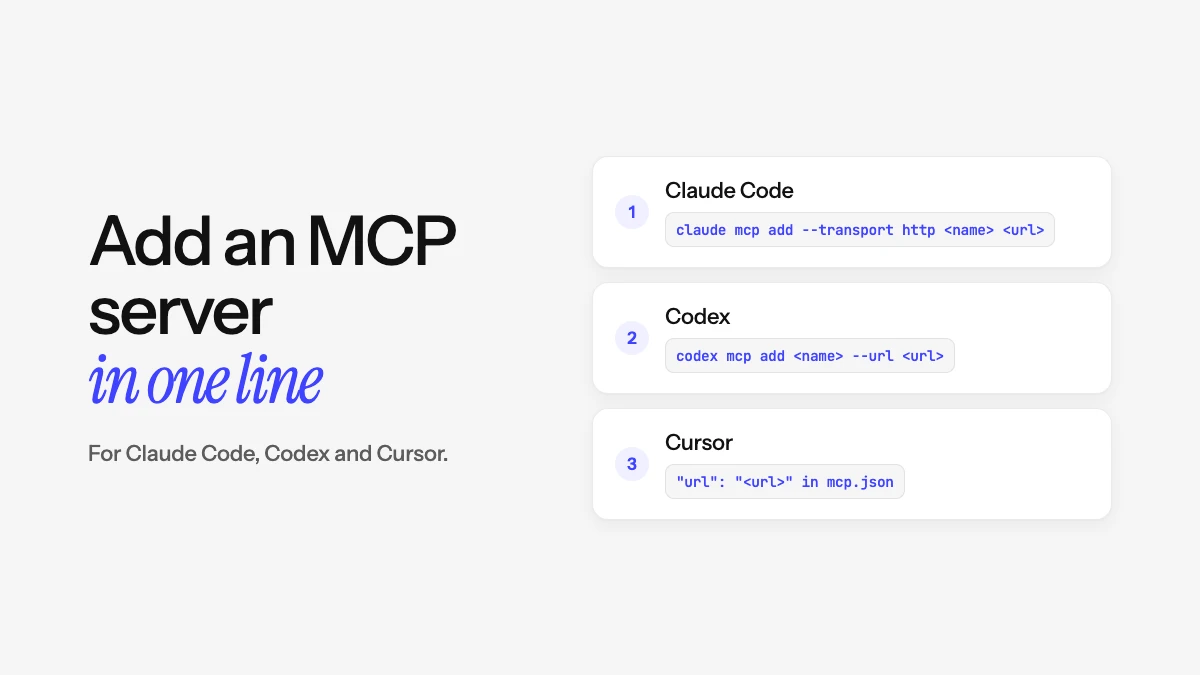
Each tool takes a remote MCP server in one line or one small config entry. Claude Code has a command, Codex has a command and a TOML file, and Cursor has a JSON file. Here is the quickest way to add a server by URL in each:
| Claude Code | Codex | Cursor | |
|---|---|---|---|
| Add a server | claude mcp add --transport http <name> <url> |
codex mcp add <name> --url <url> |
An entry with url in mcp.json |
| Sign in | /mcp or claude mcp login <name> |
codex mcp login <name> |
Sign in when Cursor asks, or add a key under headers |
| Where it’s saved | ~/.claude.json, or .mcp.json for a project |
~/.codex/config.toml, or .codex/config.toml |
~/.cursor/mcp.json, or .cursor/mcp.json |
| Check it’s connected | claude mcp list or /mcp |
codex mcp list or /mcp |
The Customize page |
Before you start, get two things from the server’s docs: its URL (it usually ends in /mcp), and how it signs you in. Most hosted servers use OAuth, which opens a browser sign-in. Some want an API key instead.
How to Add an MCP Server to Claude Code
Run this in your terminal, swapping in the server’s name and URL:
claude mcp add --transport http notion https://mcp.notion.com/mcpThen open Claude Code, type /mcp and pick the server to sign in. If you’d rather sign in from the shell, run claude mcp login notion. On a remote machine with no browser, it prints a link to open on your own computer instead.
Pick a scope
The --scope flag decides who gets the server and where:
- local (the default): only you, only in this project.
- project: written to
.mcp.jsonin the project root. Commit it and your whole team gets the server. - user: only you, in every project on your machine.
For an API key instead of OAuth, add a header: --header "Authorization: Bearer YOUR_KEY". Use claude mcp list to see your servers, claude mcp get <name> to check one, and claude mcp remove <name> to delete it.
One shortcut: if you sign in to Claude Code with your Claude account, the connectors you added in the Claude app show up automatically. Our guide to Claude connectors and MCP covers that side.
How to Add an MCP Server to Codex
Codex keeps MCP servers in ~/.codex/config.toml. The Codex CLI, the IDE extension and the ChatGPT desktop app all read the same file, so you set a server up once and it works in each.
From the command line
codex mcp add notion --url https://mcp.notion.com/mcp
codex mcp login notion
Over SSH, add --no-browser to the login command, open the link it prints, and paste the redirect URL back into the terminal. Run codex mcp list to check, or type /mcp inside Codex.
In config.toml
[mcp_servers.notion]
url = "https://mcp.notion.com/mcp"
For an API key, add bearer_token_env_var = "NOTION_TOKEN" and keep the key in that environment variable. To share a server with a project, put the same table in .codex/config.toml in the repo. Codex only reads it for projects you’ve marked as trusted.
In the IDE extension
Open the gear menu, choose MCP servers, then Add server. Pick Streamable HTTP, paste the URL, save, and restart the extension. Click Authenticate next to any server that needs a sign-in.
How to Add an MCP Server to Cursor
Official servers are one click away: open the Cursor Marketplace, click Add to Cursor, and sign in. For anything else, edit mcp.json. Use ~/.cursor/mcp.json to have the server in every project, or .cursor/mcp.json for one project.
{
  "mcpServers": {
    "notion": {
      "url": "https://mcp.notion.com/mcp"
    }
  }
}
If the server uses OAuth, Cursor handles the sign-in in your browser. If it wants an API key, add it under headers, ideally from an environment variable:
"headers": { "Authorization": "Bearer ${env:MY_SERVICE_TOKEN}" }Turn servers on and off from Customize in the sidebar. Cursor asks before it runs an MCP tool, unless your run mode says otherwise.
Example: Make a Demo Video of What You Just Shipped
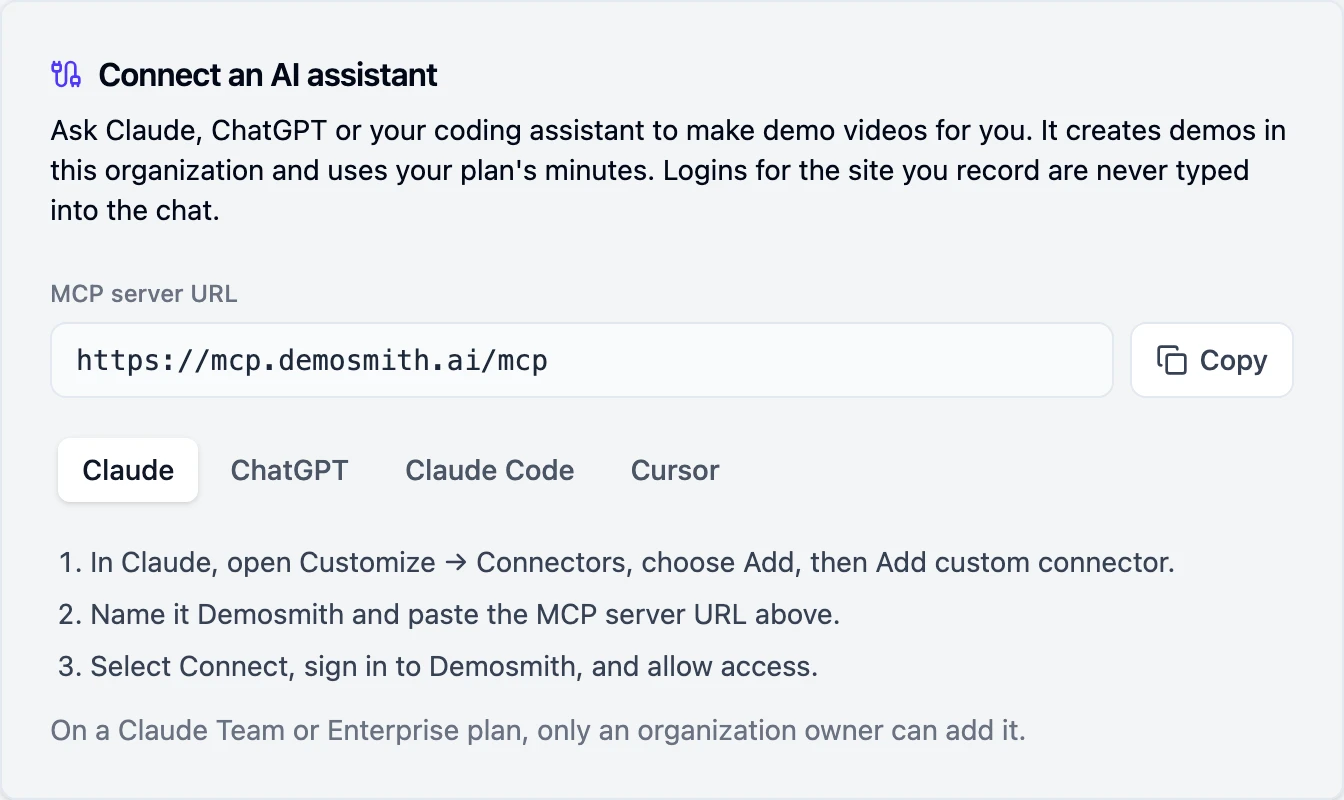
A practical use for MCP in a coding agent: you finish a feature, and the same session hands you a demo video of it. Demosmith is an AI demo agent with a remote MCP server. It opens your product in a real browser, clicks through the flow you name and returns a narrated video.
Claude Code:
claude mcp add --transport http demosmith https://mcp.demosmith.ai/mcpCodex:
codex mcp add demosmith --url https://mcp.demosmith.ai/mcp
codex mcp login demosmithCursor, with an API key from the Developers page in Demosmith (workspace owners and admins can create one):
{
  "mcpServers": {
    "demosmith": {
      "url": "https://mcp.demosmith.ai/mcp",
      "headers": { "Authorization": "Bearer YOUR_API_KEY" }
    }
  }
}
Then ask: "Make a Demosmith demo of staging.yourapp.com showing the new export button." The agent checks the details with you first, and checking costs nothing. If the recording hits a sign-in page, you type the login in Demosmith, so it never lands in your terminal or chat history.
Want this without a chat at all, say on every merge to main? The Demosmith API starts the same demo from your release pipeline.
The Demosmith MCP page has the setup for Claude and ChatGPT too.
If your team still records release videos by hand, our guide to Loom alternatives for product demos covers the other options.
Troubleshooting
- Claude Code skips the server. In a hand-written
.mcp.json, an entry with aurlalso needs"type": "http". Without it, Claude Code treats the entry as a local command and skips it. - The project server never loads in Claude Code. Servers from a shared
.mcp.jsonwait for your approval. Runclaude mcp get <name>to see its status. - Codex ignores the project config.
.codex/config.tomlonly loads in trusted projects. - The IDE extension doesn’t see a new server. Restart the extension after you add it.
- Cursor shows an error. Open the Output panel, choose MCP Logs, and look for connection or sign-in errors.
For the wider picture of tools that make product videos, including ones that need no setup at all, see our roundup of AI demo video generators.
Frequently Asked Questions
How do I add an MCP server to Claude Code?
Run claude mcp add --transport http
Where does Codex store MCP servers?
In ~/.codex/config.toml, under a [mcp_servers.
Where is Cursor's mcp.json?
Use ~/.cursor/mcp.json for servers you want in every project, or .cursor/mcp.json inside a project folder for that project only.
Can I share MCP servers with my team?
Yes. Commit .mcp.json for Claude Code, .codex/config.toml for Codex (trusted projects only) or .cursor/mcp.json for Cursor. Keep API keys out of these files and read them from environment variables instead.
Can a coding agent make a demo video with MCP?
Yes, with a video MCP server added. With Demosmith connected, Claude Code, Codex or Cursor can ask for a narrated demo of your product and give you the video link.
Key Takeaways
- One command each.
claude mcp add,codex mcp add, or a few lines in Cursor’smcp.json. - Sign in separately.
/mcpin Claude Code,codex mcp loginin Codex, the browser prompt in Cursor. - Share with your team through the project file.
.mcp.json,.codex/config.tomlor.cursor/mcp.json. - A server can make things, too. With Demosmith added, your coding agent can hand you a demo video of the feature you just built.