The Short Answer
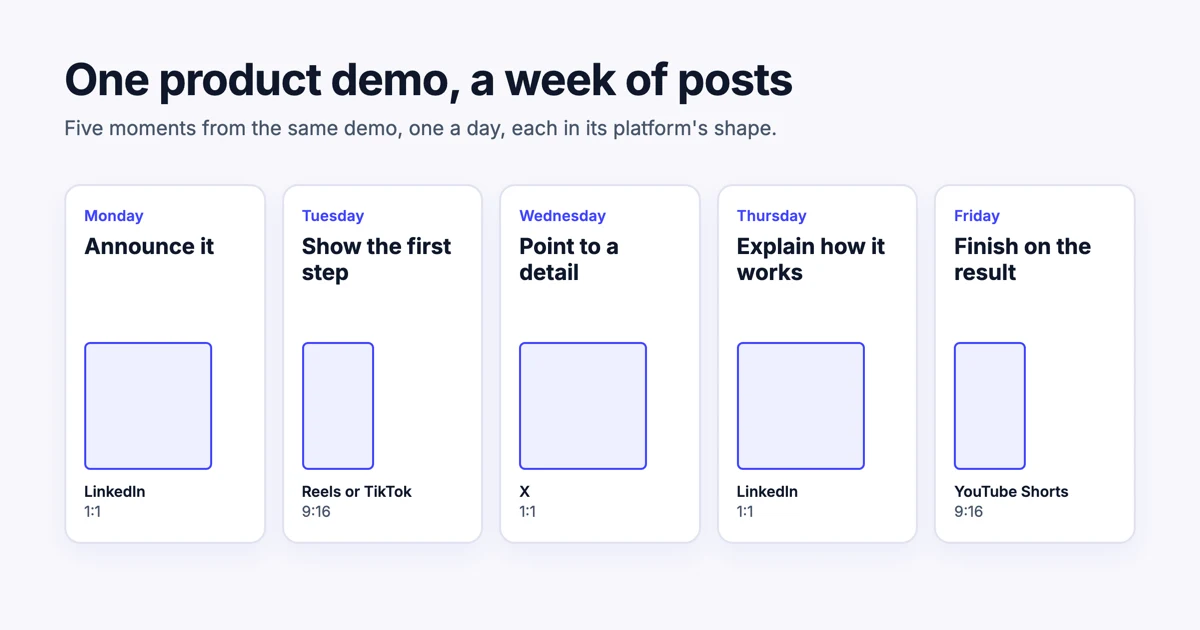
One product demo holds a week of social posts if you stop treating it as one video. Split it into five moments, one idea each: the announcement, the first step, a detail, how it works and the result. Post one a day, each in the shape its platform prefers, with a caption that makes the point in its first line.
That is the whole method. The rest of this guide is the detail: which moment goes on which day, where to post it, in which shape, and what to write with it. We walk through a full week for a fictional analytics product, Northwind Analytics, using clips from a real Demosmith social pack.
We make Demosmith, whose AI demo agent records a demo of your product from a link and turns it into clips for social, so this is the week we would plan. The method works the same if you cut the clips yourself.
Step 1: Find the Five Moments in Your Demo
Most product demos follow one workflow from start to finish. Inside that workflow are five moments that each make a post on their own:
- The announcement. What the product does, in one line, with the whole flow shown fast.
- The first step. The click that starts the workflow. It shows how easy it is to begin.
- A detail. The one thing customers ask about: a setting, a filter, a field.
- How it works. The steps in order, so a viewer can follow along.
- The result. What the customer has at the end: the report, the invoice, the published page.
Each moment answers a different question a buyer has, so the five posts do not repeat each other. A follower who sees all five has watched your demo, one piece a day.
Step 2: The Week at a Glance
The plan below puts each moment on the platform where it fits best, in that platform's shape. It matches the week on our social clips page:
| Day | The post's job | What to post | Where | Shape |
|---|---|---|---|---|
| Monday | Announce it | The motion graphic: the whole story in under 30 seconds | 1:1 | |
| Tuesday | Show the first step | The clip of the first click | Instagram Reels or TikTok | 9:16 |
| Wednesday | Point to a detail | The clip of the detail customers ask about | X | 1:1 |
| Thursday | Explain how it works | The steps in order, one per slide or one per line of caption | 1:1 | |
| Friday | Finish on the result | The clip of the finished result | YouTube Shorts | 9:16 |
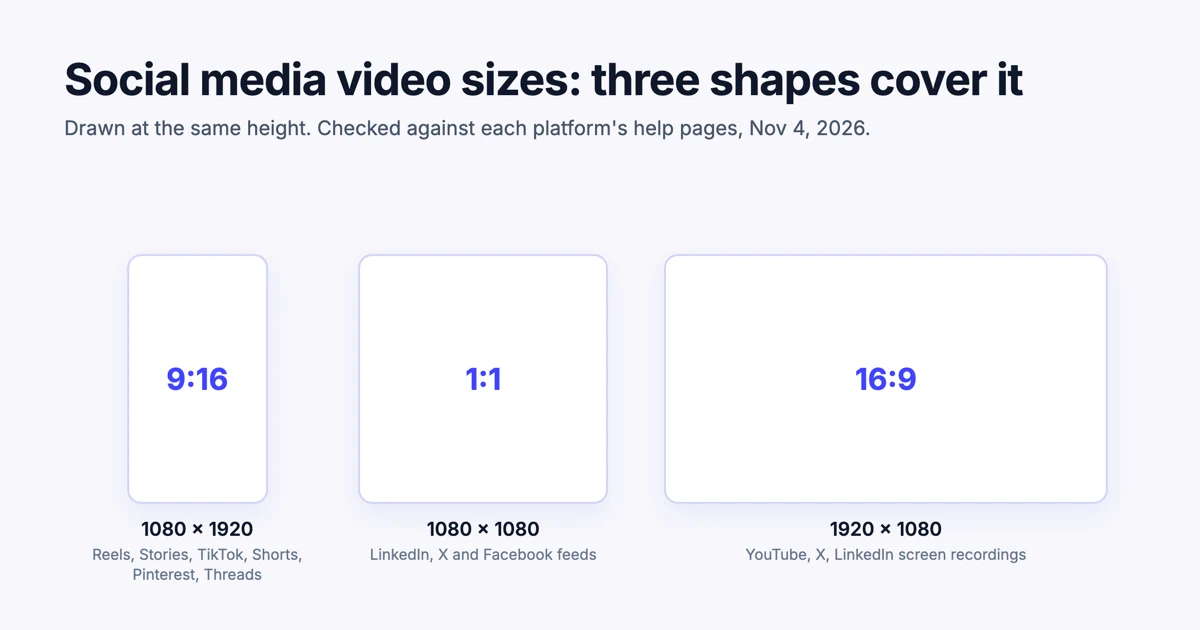
Swap platforms to suit your audience. If your buyers live on LinkedIn, post all five there and keep the vertical versions for later. What matters is one moment per day and the right shape for wherever it goes. Our guide to social media video sizes lists the exact size for every platform.
Step 3: Day by Day, With a Worked Example
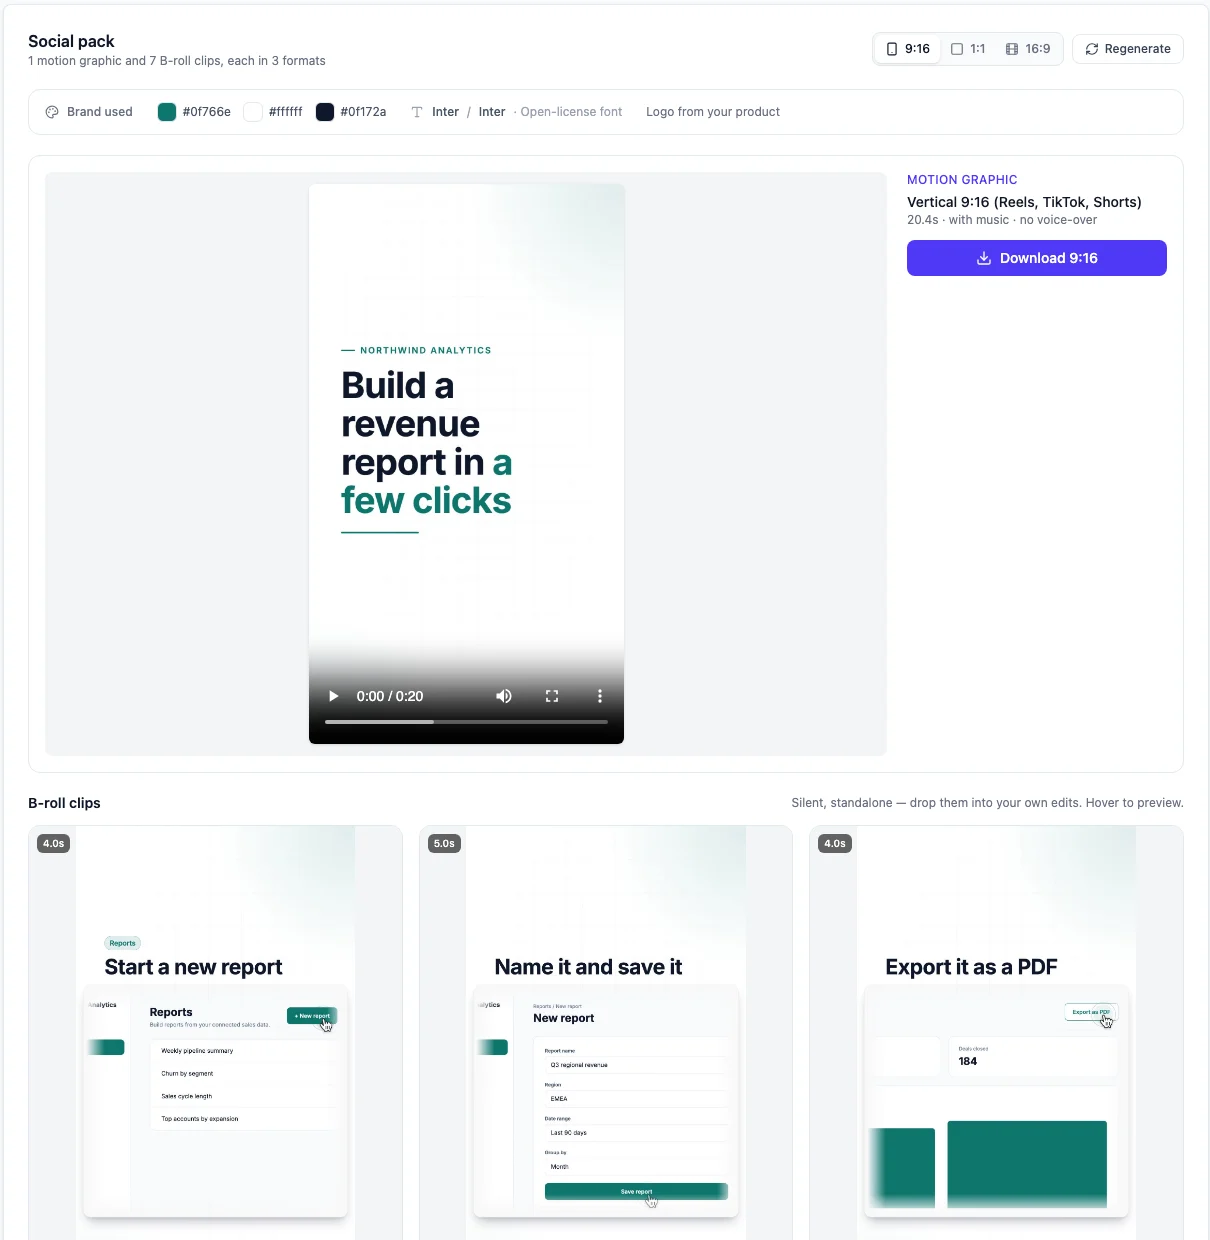
Take Northwind Analytics, a fictional reporting tool. Its demo shows one workflow: building a revenue report and exporting it. The Demosmith social pack made from that demo has a 20-second motion graphic titled "Build a revenue report in a few clicks" and 7 B-roll clips, including "Start a new report", "Name it and save it" and "Export it as a PDF".
Monday: announce it on LinkedIn
Post the square motion graphic. It tells the whole story with music and moving text, so it works for people scrolling with the sound off. The caption's first line carries the point, because LinkedIn cuts the rest behind "see more".
Example caption: "Building a revenue report used to mean an afternoon in spreadsheets. In Northwind it takes a few clicks. Watch the whole thing in 20 seconds."
Tuesday: show the first step on Reels or TikTok
Post the vertical "Start a new report" clip. It shows how easy it is to begin, which is a good first thing to show a stranger on Reels. Keep the caption short and put the words that matter on screen.
Example caption: "Step one of every Monday report. One button."
Wednesday: point to a detail on X
Post the square "Name it and save it" clip, which shows the region, date range and grouping being set. Pick the detail your customers ask about in sales calls or support tickets. A short post on X that answers one real question beats a feature list.
Example caption: "Yes, you can report on one region and a custom date range. It is two fields."
Thursday: explain how it works on LinkedIn
Take the steps in order: start a report, name it and set the filters, export it. Post them as a LinkedIn document post with one still from each clip per slide and one line of text on each, or, if your pack has a clip that shows the steps in order, post that one in square. This is the post that teaches, so give each step its own line.
Example caption: "How a revenue report gets built in Northwind: 1. New report. 2. Pick the region and dates. 3. Export as a PDF. That is it."
Friday: finish on the result on YouTube Shorts
Post the vertical "Export it as a PDF" clip. End the week on what the customer walks away with. On YouTube, any vertical or square video up to 3 minutes long counts as a Short, so this clip goes out as one.
Example caption: "The finished report, ready to send. Built in a few clicks."
Five posts, one demo, and none of them repeats another, because each one answers a different question.
If You Have No Clips Yet
The same five moments work without video. Take a screenshot of each moment and build the week from stills:
- Monday: a text post that names the problem, with one screenshot of the finished result.
- Tuesday: a single screenshot of the first step, with an arrow on the button.
- Wednesday: a close-up of the detail, cropped tight so it reads on a phone.
- Thursday: a document post or carousel, one step per slide.
- Friday: a before and after, the old way next to the result.
Stills are a fair start, but a screenshot only shows a screen. A clip shows the product working, which is the thing a buyer is trying to judge. When you can, move the week to video.
Rules That Keep the Week Working
- One idea per post. If a caption needs "and also", it is two posts.
- The point goes first. The opening line of the caption carries the message, and so does the first second of the clip. Nobody reads to the end to find it.
- The right shape, not a crop. Post 9:16 to vertical apps and 1:1 to feeds. Cropping a wide screen into a tall one throws away the part you wanted to show.
- Words on screen. Some viewers scroll with the sound off, and B-roll clips are silent anyway.
- Rewrite the caption for each platform. Post the same moment in each place if you like, but write each caption for its audience.
- Make it again when the product changes. A week built from an old demo shows an old product. Plan to make a new demo, and a new week, whenever the interface changes.
Make the Week's Clips With Demosmith
The slow part of this plan is making the clips. Cutting five moments from a screen recording, in two or three shapes each, takes real editing time. Demosmith does that part. It opens your product from a link, clicks through the flow you describe and records a narrated product demo video. From any finished demo, it makes a social pack: a 15 to 30 second motion graphic with music and 5 to 8 silent B-roll clips, each showing one moment, in your brand colours and fonts.
Set against the plan above, a social pack covers each day:
| The week needs | What a Demosmith social pack gives you |
|---|---|
| An announcement for Monday | The motion graphic, which opens on a hook, shows the product and ends on a call to action. |
| One clip per moment | 5 to 8 B-roll clips, each showing one moment: the key click, a feature in focus, how it works, the result. |
| The right shape for each platform | Every clip in 9:16, 1:1 and 16:9, each laid out for its shape. |
| Posts that work with the sound off | Moving text over music in the motion graphic, and silent B-roll clips. |
| Your brand | Colours, fonts and logo read from your product, or from your saved Brand Kit. |
To make one, open a finished demo, choose the Social tab and click Generate social pack. Social packs come with every paid plan, starting with Starter at $40 a month, and each pack uses 1 AI minute. Demosmith does not post for you: you download the clips and post them yourself, or through the scheduling tool you already use. Packs work on demos Demosmith recorded itself, not on videos you upload.
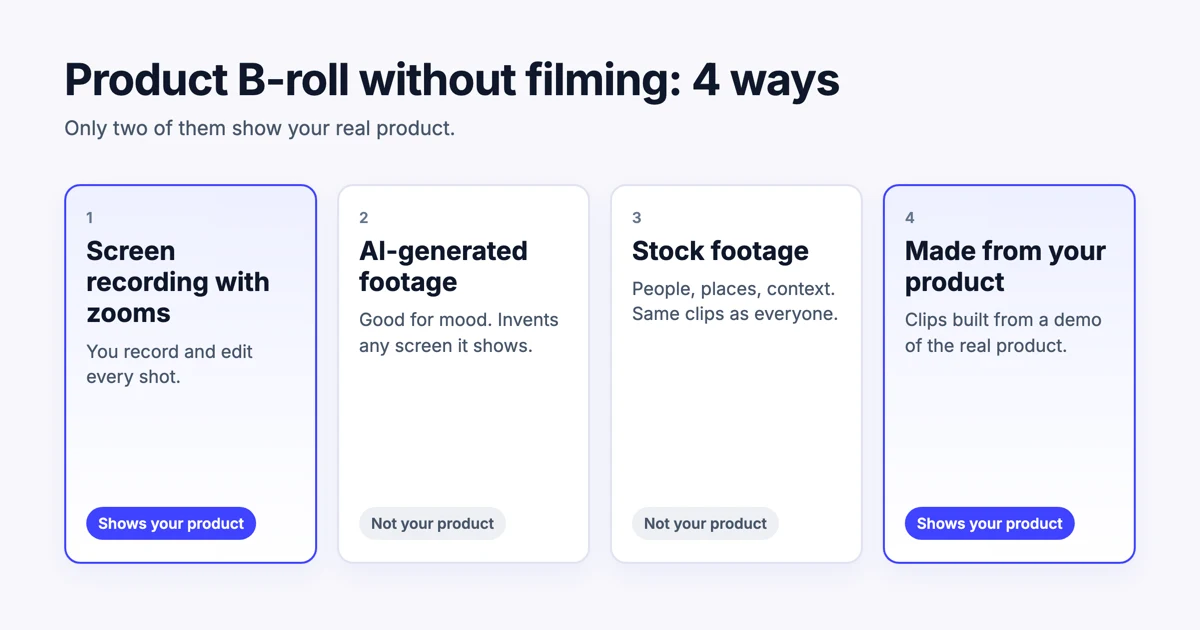
For more on what is in a pack, see our launch post on social clips and product films, and for using the clips inside longer videos, our guide to product B-roll without filming.
Conclusion
Announce it, show the first step, point to a detail, explain how it works, finish on the result. One demo, five days.
A product demo often gets posted once and then forgotten. Split it into five moments and it carries a week. Keep one idea per post, lead with the point and post each moment in the shape its platform wants.
If making the clips is what stops you, make a demo in Demosmith and generate its social pack: the motion graphic covers Monday and the B-roll clips cover the rest. If you are about to launch a feature, our guide to feature announcement videos covers the Monday post in more depth. For the wider market of tools that make product video, see the best AI demo video generators in 2026.
Key Takeaways
- One product demo holds five posts: the announcement, the first step, a detail, how it works and the result.
- Post one moment a day, each on the platform where it fits and in that platform's shape.
- Lead every caption with the point, and put key words on screen for viewers with the sound off.
- Without video, build the same week from screenshots and a carousel, then move to clips when you can.
- Make a new demo, and a new week, when the product changes.
- A Demosmith social pack gives you a motion graphic and 5 to 8 B-roll clips from one demo, each in 9:16, 1:1 and 16:9. You post them yourself.
Want a week of posts from your own product without editing anything? Start with Demosmith, make a demo, then turn it into a social pack.